Setting Up Jenkins for Automated Site Deployments
What is Jenkins?
Jenkins is an open-source automation server that has become the de facto standard for implementing continuous integration and continuous delivery (CI/CD) pipelines. Written in Java, Jenkins allows developers to automate the building, testing, and deployment of software projects. It works by monitoring repositories for changes and automatically triggering predefined jobs when new commits are detected. With hundreds of plugins available, Jenkins can integrate with virtually any tool in your development workflow, from version control systems like Git and Forgejo to deployment platforms and notification services.
At its core, Jenkins operates on a controller-agent architecture. The controller (previously called “master”) orchestrates the workflow, schedules jobs, and provides the web interface for configuration and monitoring. Agents (also called “nodes”) are machines that actually execute the build jobs. This distributed architecture allows you to scale your CI/CD infrastructure horizontally and run builds on different operating systems or environments. Whether you’re building a simple static site or orchestrating complex microservices deployments, Jenkins provides the flexibility and extensibility to handle it all.
Setting Up the Stream in NPM
Before Jenkins can receive webhooks from Forgejo or communicate with my other services, I needed to configure the networking through my Nginx Proxy Manager (NPM) instance running in Docker. NPM acts as my reverse proxy and handles all incoming traffic to my homelab services.
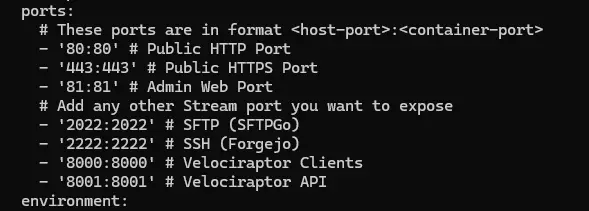
First, I updated the Docker Compose file to expose the necessary ports. The key additions were port 2022 for SFTPGo and port 2222 for Forgejo’s SSH access:
With the ports exposed on the container, I then configured streams in NPM to forward traffic to the appropriate destinations. Streams work at the TCP level, allowing non-HTTP traffic like SSH to pass through the proxy.
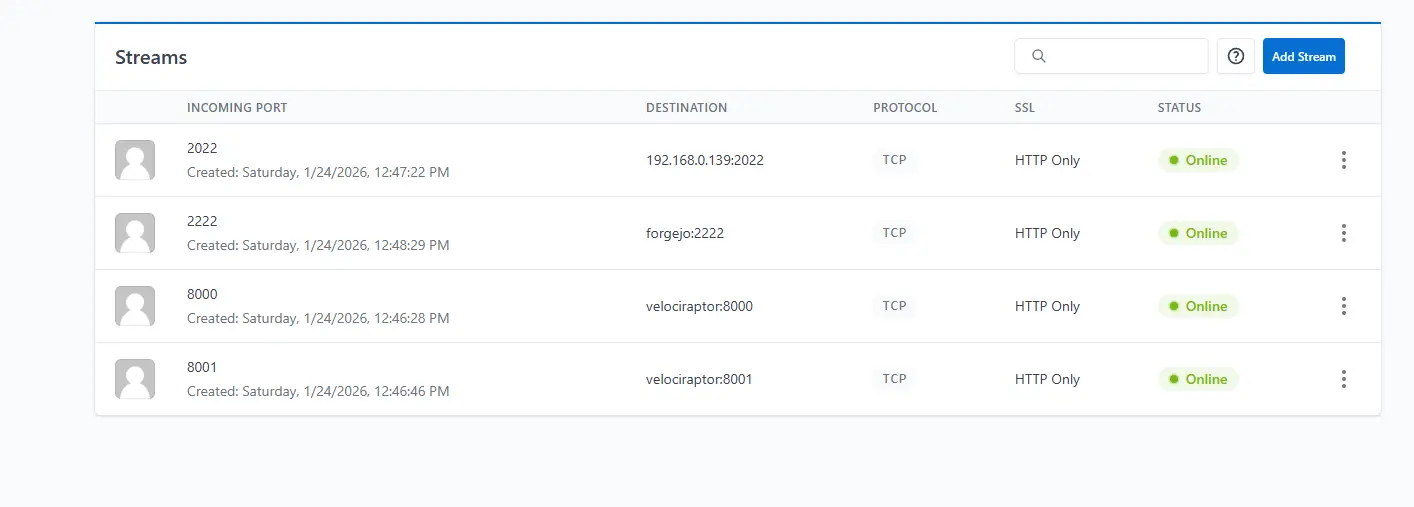
The stream on port 2222 forwards to forgejo:2222, which allows SSH connections to reach my Forgejo instance. Port 2022 forwards to 192.168.0.139:2022 for SFTPGo access. This configuration is essential for the SSH-based git operations that Jenkins will use to pull code from my repositories.
Configuring Jenkins
After logging into Jenkins, the first step is familiarizing yourself with the management interface:
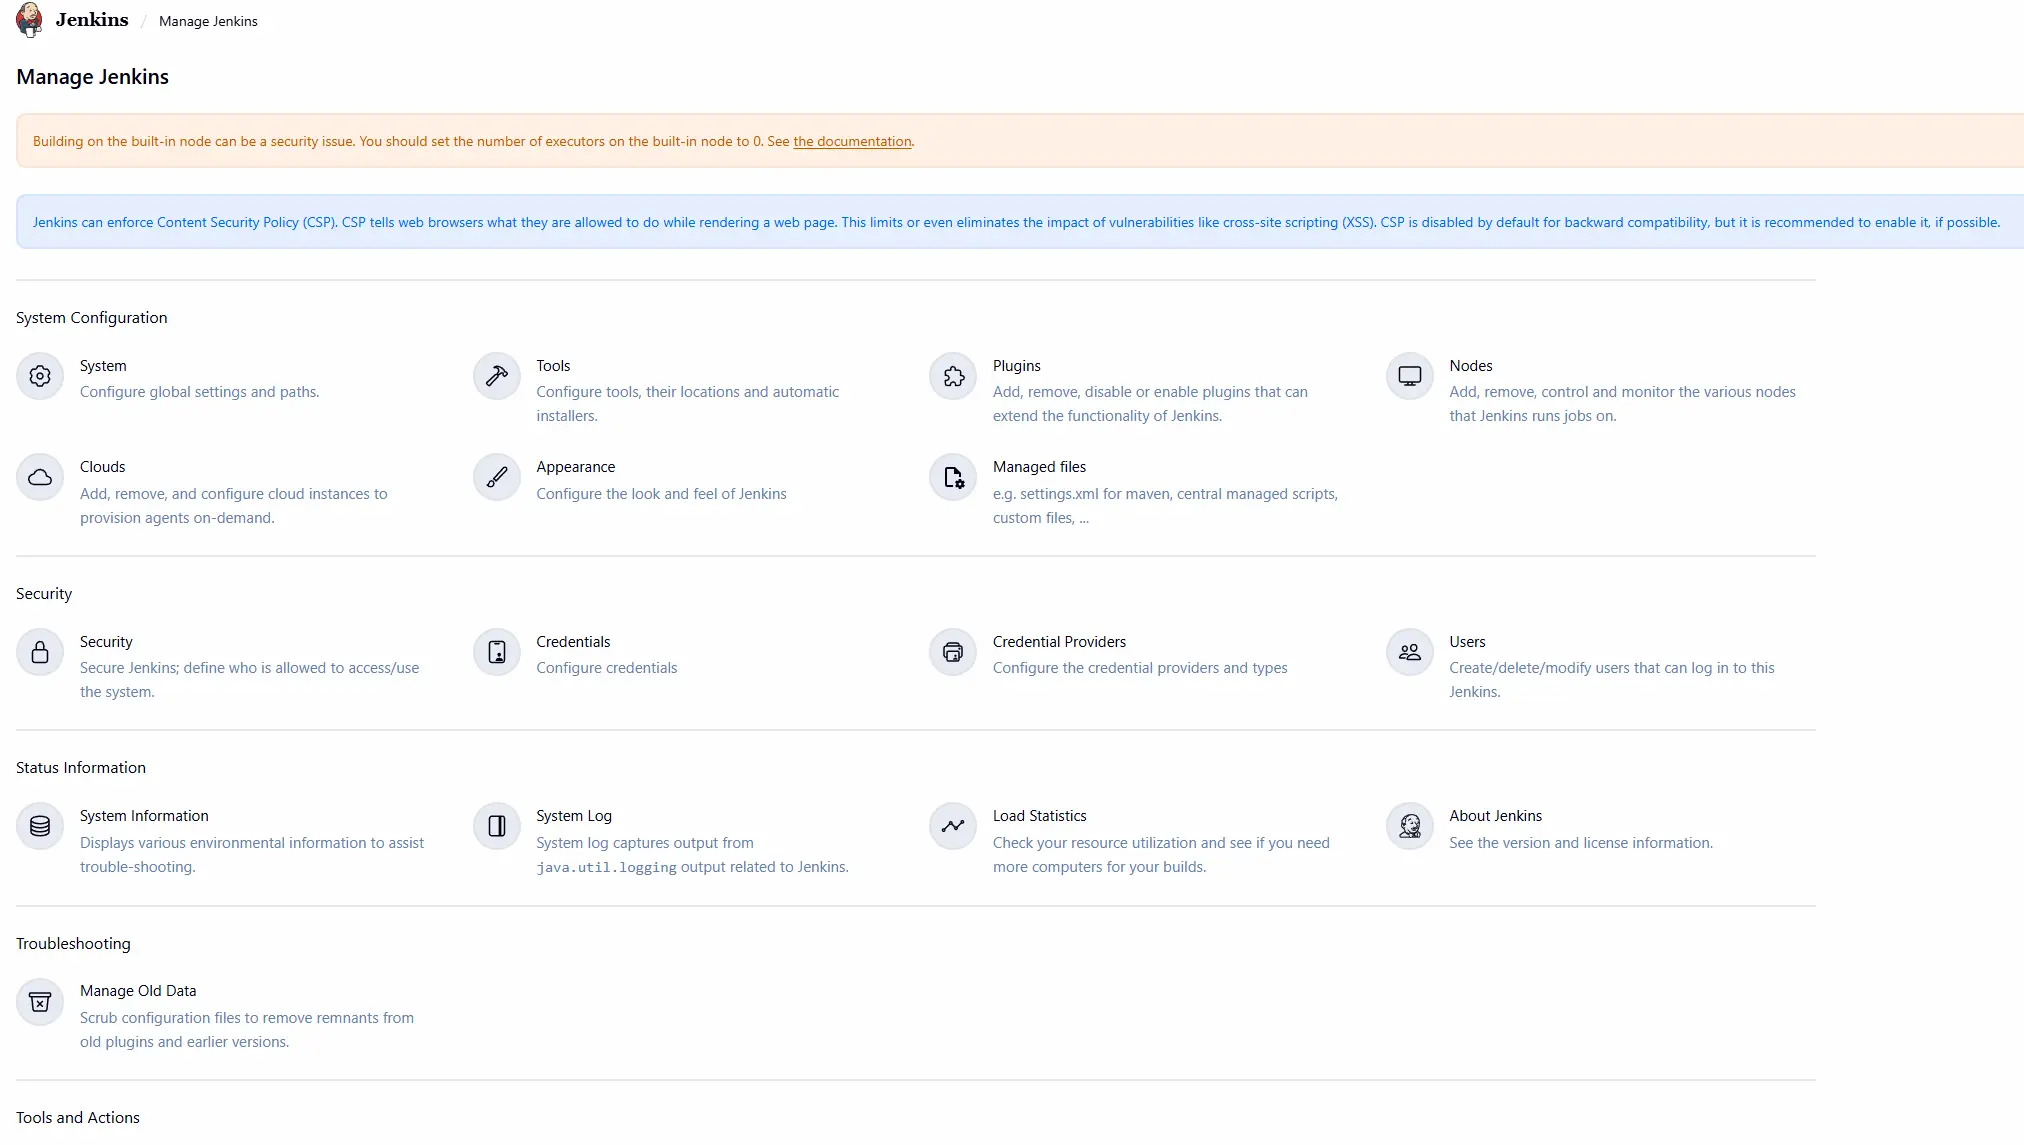
The Manage Jenkins page provides access to all system configuration options, including plugins, credentials, nodes, and security settings:
Installing the Gitea Plugin
Since Forgejo is a fork of Gitea, I installed the Gitea plugins to enable integration between Jenkins and my git server:
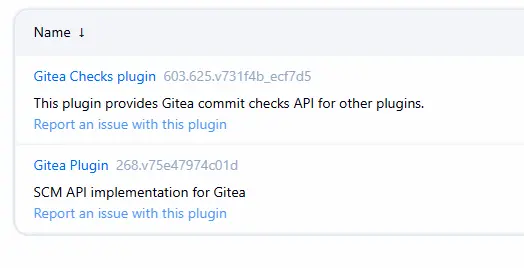
The Gitea Plugin provides SCM (Source Code Management) API implementation, while the Gitea Checks plugin enables commit status reporting back to Forgejo.
Adding the Gitea Server
In the system configuration, I added my Forgejo instance as a Gitea server. This tells Jenkins where to find my git repositories and enables webhook integration:
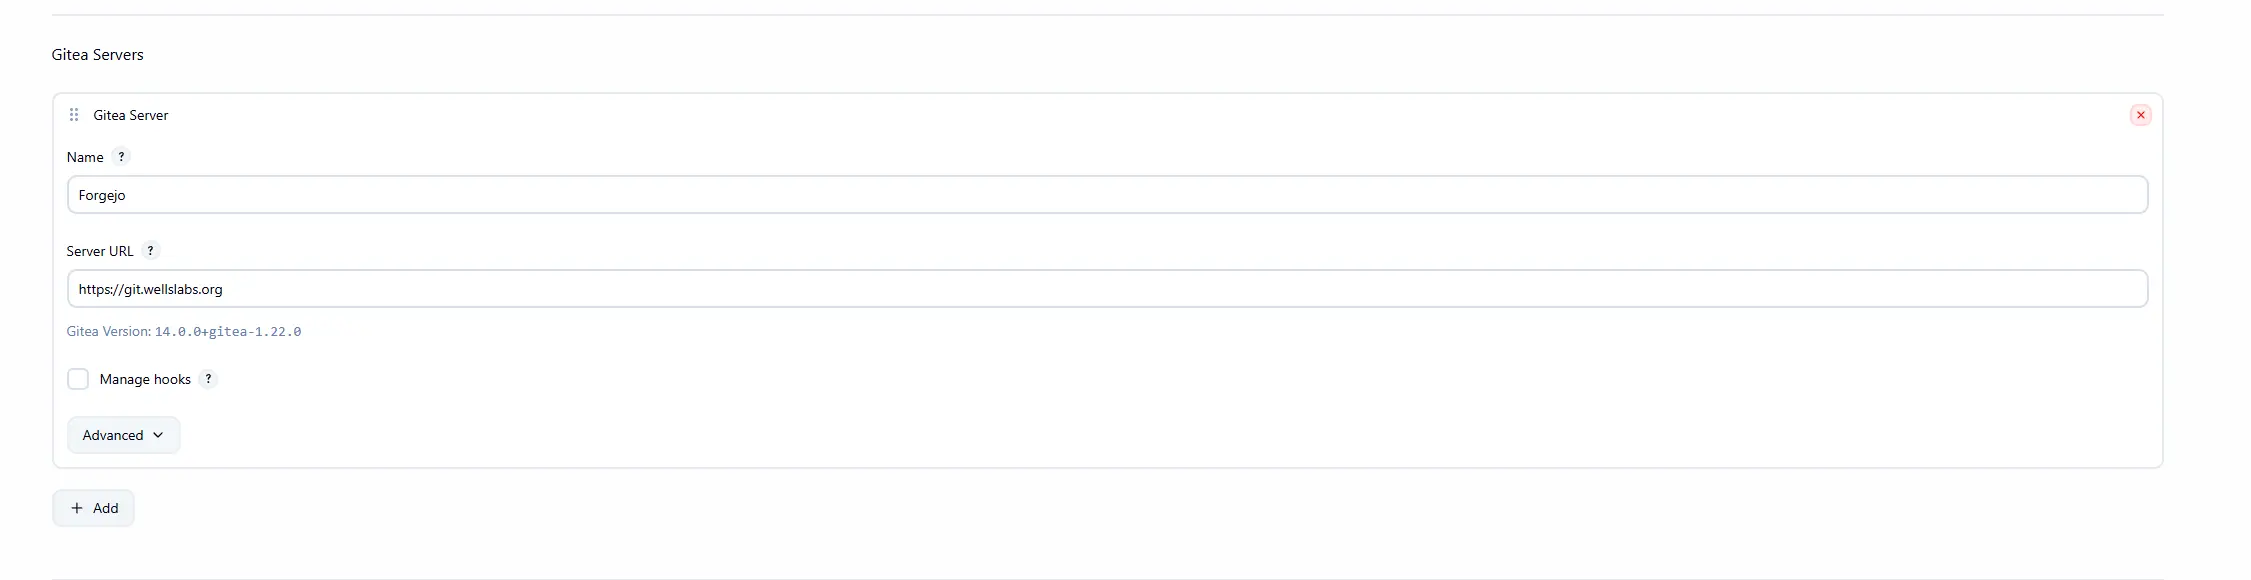
The server is named “Forgejo” with the URL pointing to https://git.wellslabs.org. Jenkins detected it as Gitea version 14.0.0+gitea-1.22.0, which confirms the Forgejo compatibility.
Adding Credentials to Jenkins
For Jenkins to pull code from private repositories and deploy to remote servers, it needs SSH credentials. In the Credentials section of Manage Jenkins, I added an SSH private key credential for accessing my web server. This credential is labeled “root (Web-Dev lxc running on PVE2)” to identify which server it authenticates to.
Creating the Jenkins Node
Jenkins can execute builds on the built-in controller node, but for security and performance reasons, it’s better to use separate agent nodes. I configured a remote node called “Web-Dev” that runs on my Ubuntu web server:
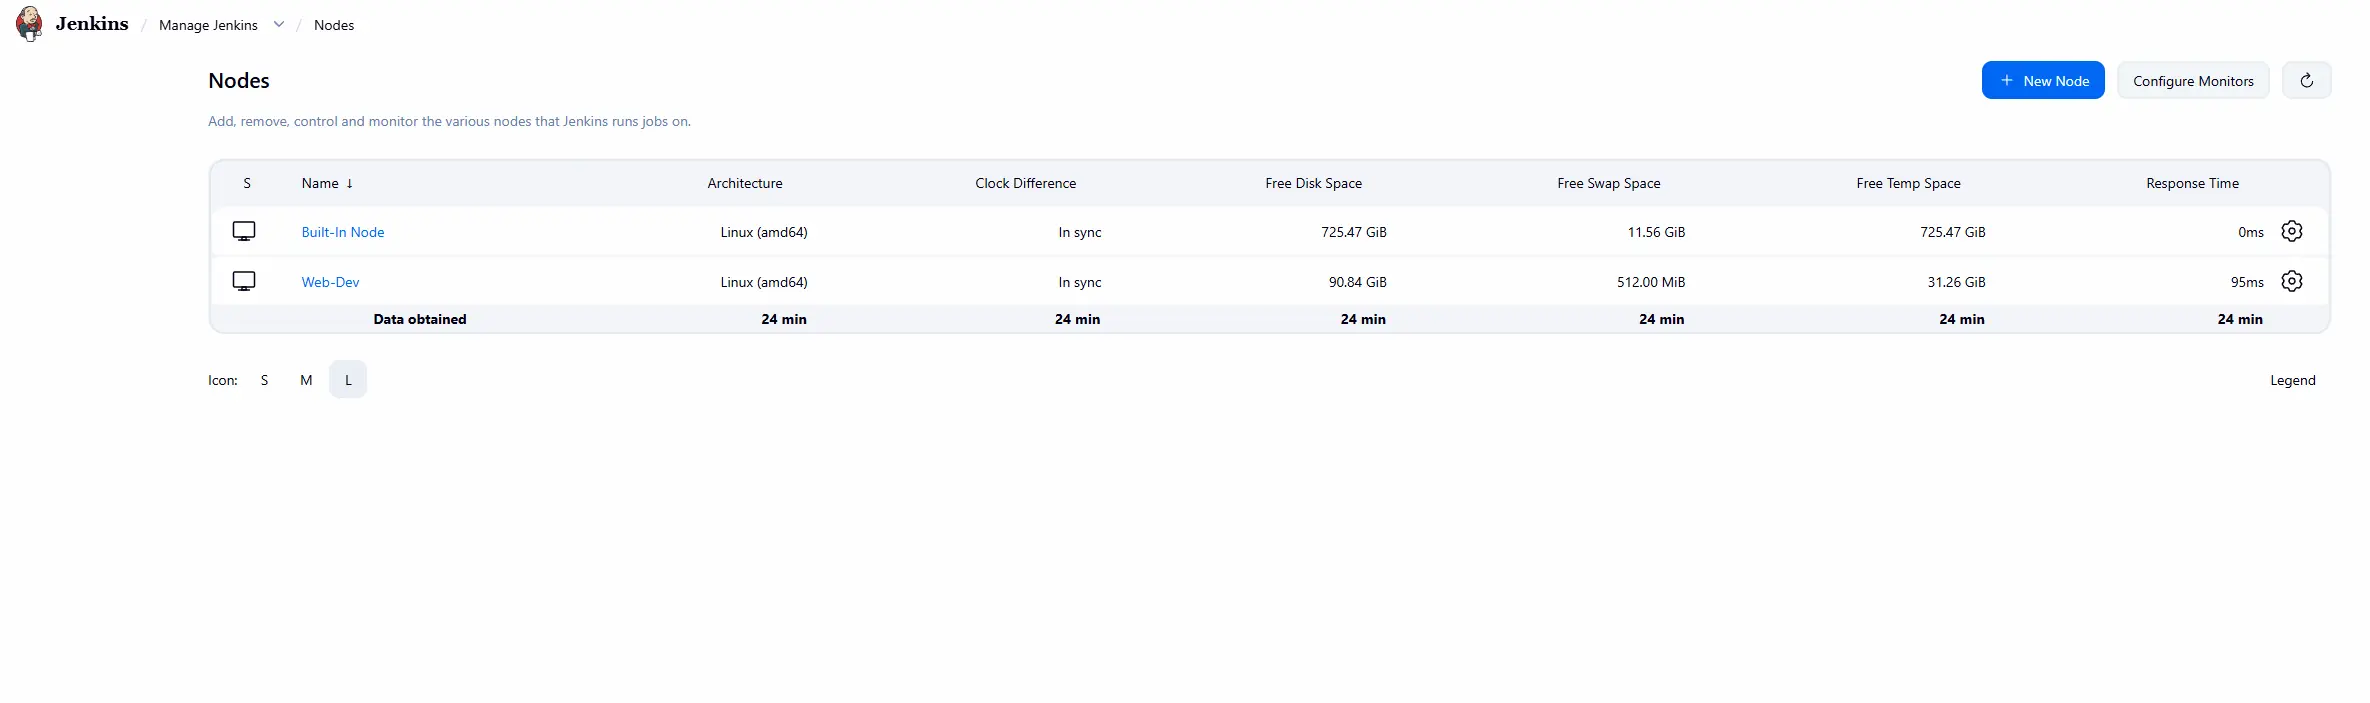
The nodes view shows both the Built-In Node (the Jenkins controller) and my Web-Dev agent. Both are running Linux (amd64) and are in sync. The Web-Dev node has 90.84 GiB of free disk space and 512 MiB of swap, with a response time of 95ms indicating healthy connectivity between Jenkins and the agent.
Setting Up the Forgejo Repository
On the Forgejo side, I created a repository for my site at wellslabs/fizban-stack.github.io-testing. The repository is forked from my main GitHub Pages repository and contains all the Jekyll source files:
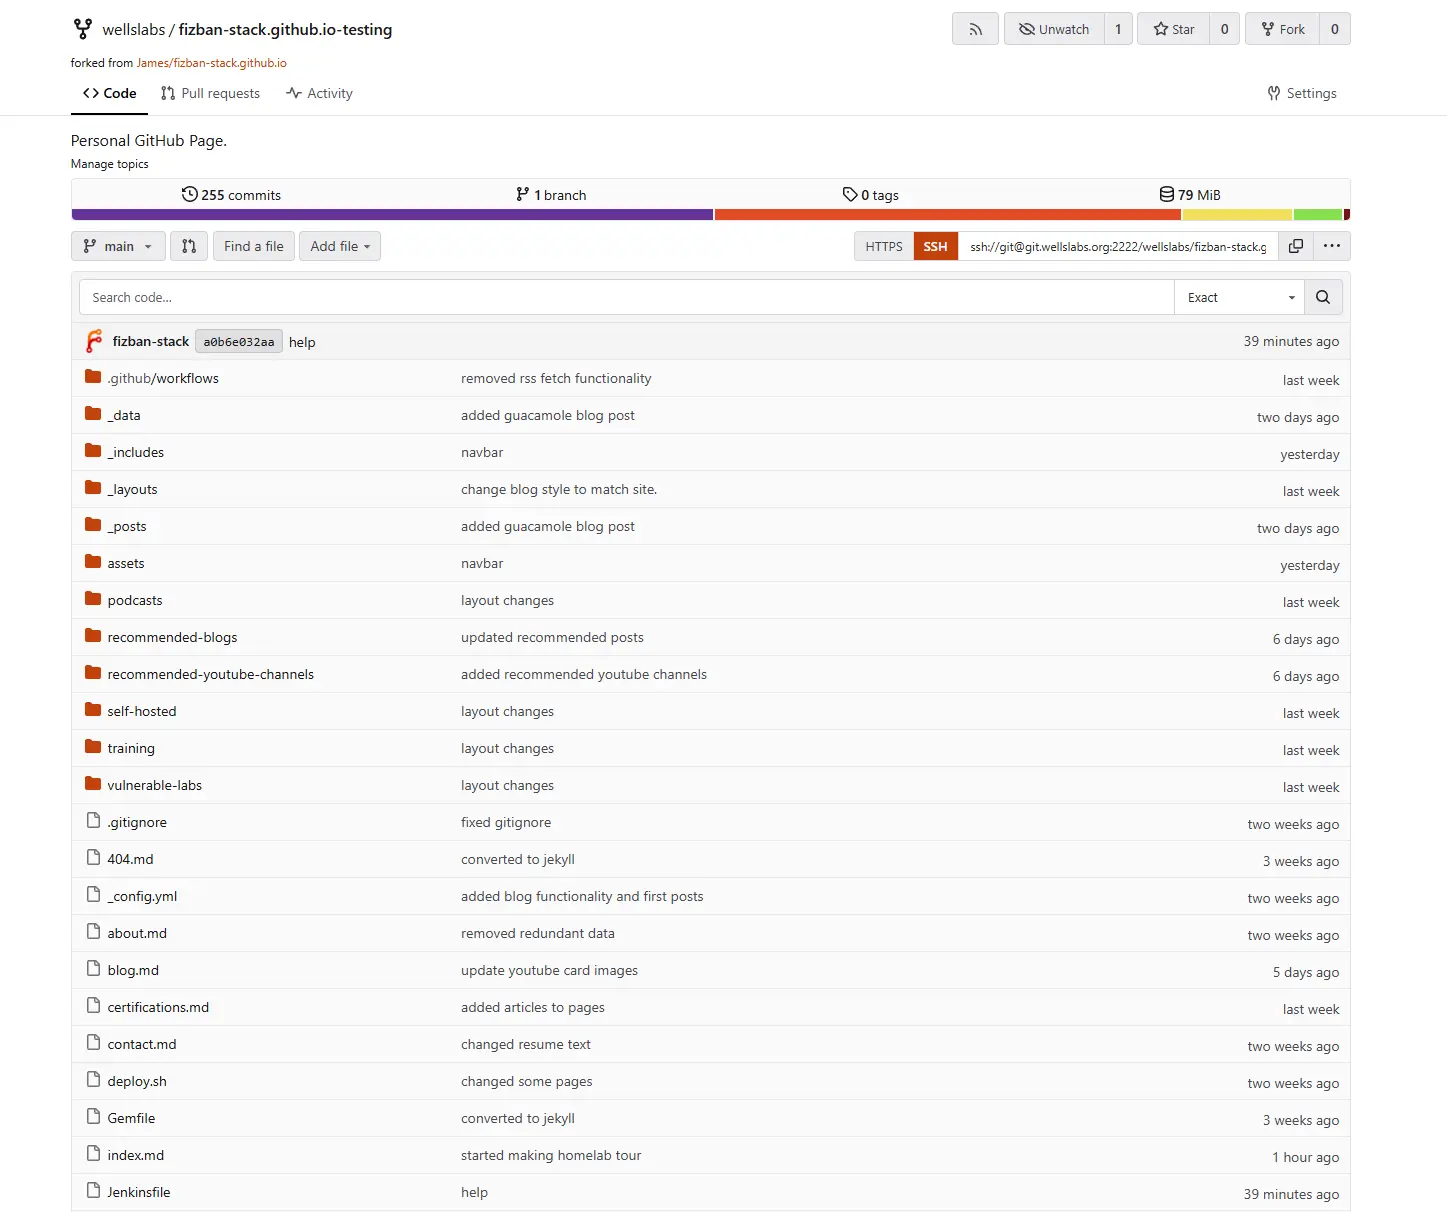
The SSH URL ssh://git@git.wellslabs.org:2222/wellslabs/fizban-stack.github.io-testing is what Jenkins uses to clone the repository. Notice the Jenkinsfile at the bottom of the file list - this defines the build pipeline.
Working with VS Code
In VS Code, I manage my site files and push changes to Forgejo. The Source Control panel shows the repository status and allows me to commit changes:
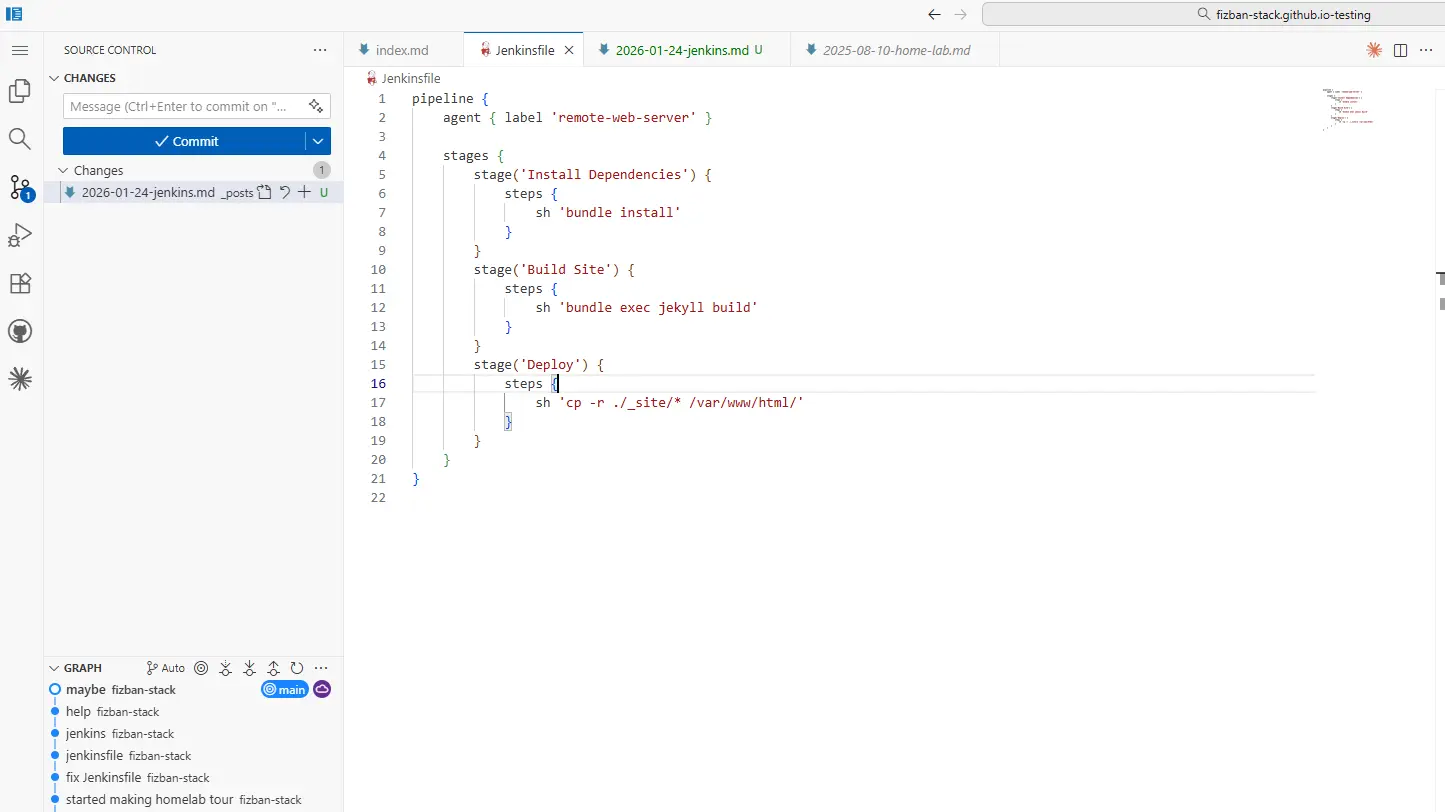
The Jenkinsfile visible in the editor defines three stages: Install Dependencies, Build Site, and Deploy. The Git Graph at the bottom shows my commit history, including the “main” branch tracked by my fizban-stack remote.
Understanding the SSH Flow
The communication chain in my setup involves multiple SSH connections:
-
VS Code to Forgejo: When I push code from VS Code, it connects via SSH to
git.wellslabs.org:2222. This traffic hits NPM, which streams it to the Forgejo container. -
Forgejo to Jenkins: When Forgejo receives a push, it triggers a webhook to Jenkins notifying it of the new commits. This happens over HTTPS.
-
Jenkins to Forgejo: Jenkins connects back to Forgejo via SSH (port 2222) to clone the repository using the configured credentials.
-
Jenkins to Web-Dev: The Jenkins controller dispatches the build job to the Web-Dev agent. The agent runs on my Ubuntu web server and executes the pipeline stages locally.
This architecture keeps everything within my homelab network while maintaining proper separation between services. The SSH keys ensure secure authentication at each hop.
Installing Dependencies on Web-Dev (Ubuntu 25)
My Web-Dev server runs Ubuntu 25 and hosts the final deployed site. Before Jenkins could build the Jekyll site, I needed to install the required dependencies on this machine:
# Install Ruby and development dependencies
sudo apt update
sudo apt install ruby-full build-essential zlib1g-dev

# Configure gem installation to user directory
echo '# Install Ruby Gems to ~/gems' >> ~/.bashrc
echo 'export GEM_HOME="$HOME/gems"' >> ~/.bashrc
echo 'export PATH="$HOME/gems/bin:$PATH"' >> ~/.bashrc
source ~/.bashrc

# Install Bundler and Jekyll
gem install bundler jekyll
With these dependencies installed, the Jenkins pipeline can execute bundle install to fetch the site’s specific gem dependencies and bundle exec jekyll build to generate the static site files.
The Jenkins Pipeline
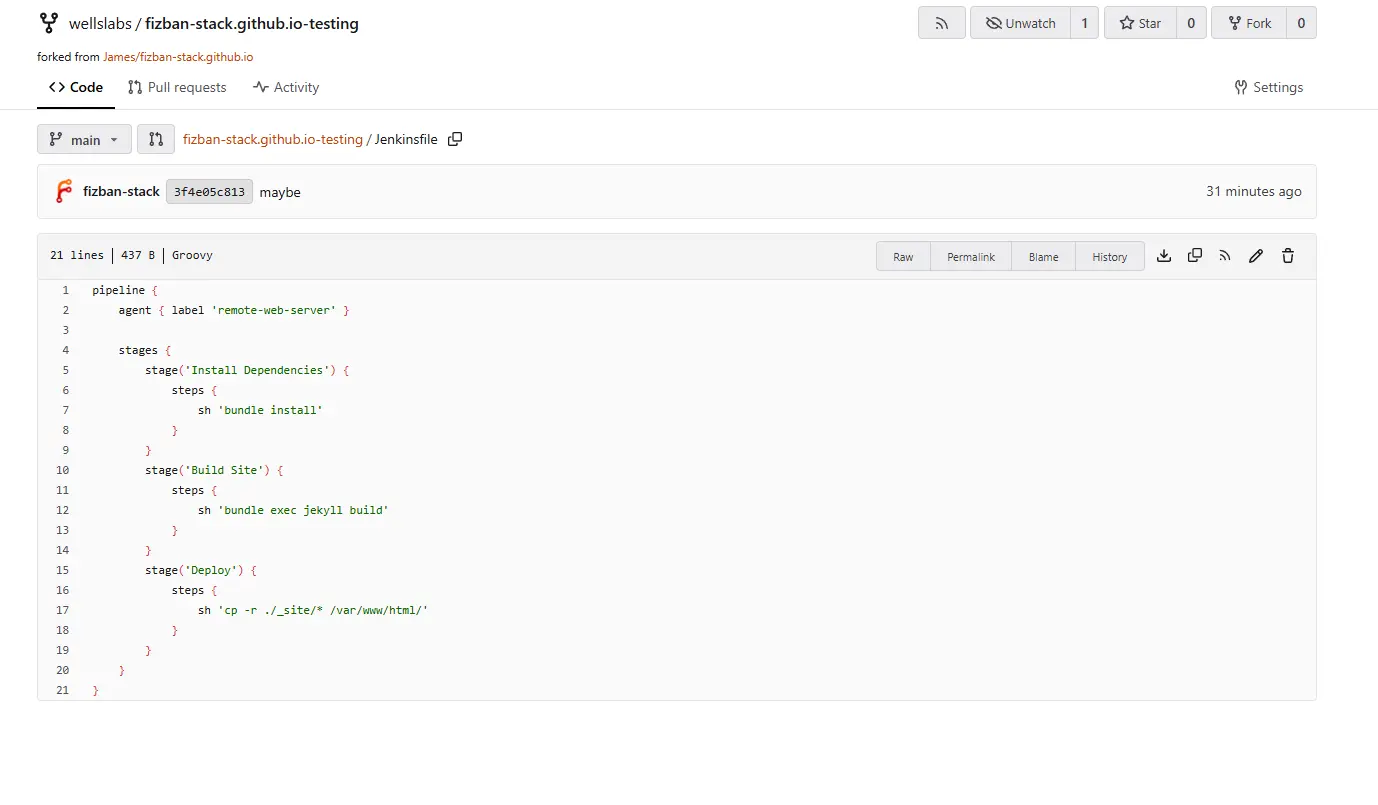
The Jenkinsfile in my repository defines the complete build and deployment process:
pipeline {
    agent { label 'remote-web-server' }

    stages {
        stage('Install Dependencies') {
            steps {
                sh 'bundle install'
            }
        }
        stage('Build Site') {
            steps {
                sh 'bundle exec jekyll build'
            }
        }
        stage('Deploy') {
            steps {
                sh '''
                rsync -av --delete \
                --no-perms \
                --no-owner \
                --no-group \
                --no-times \
                ./_site/ /var/www/html/
            '''
            }
        }
    }
}
The pipeline runs on any agent with the label “remote-web-server” (my Web-Dev node). It installs Ruby gem dependencies, builds the Jekyll site, and copies the generated files to the web server’s document root.
Pipeline Configuration
In Jenkins, I configured the pipeline to pull from my Forgejo repository:
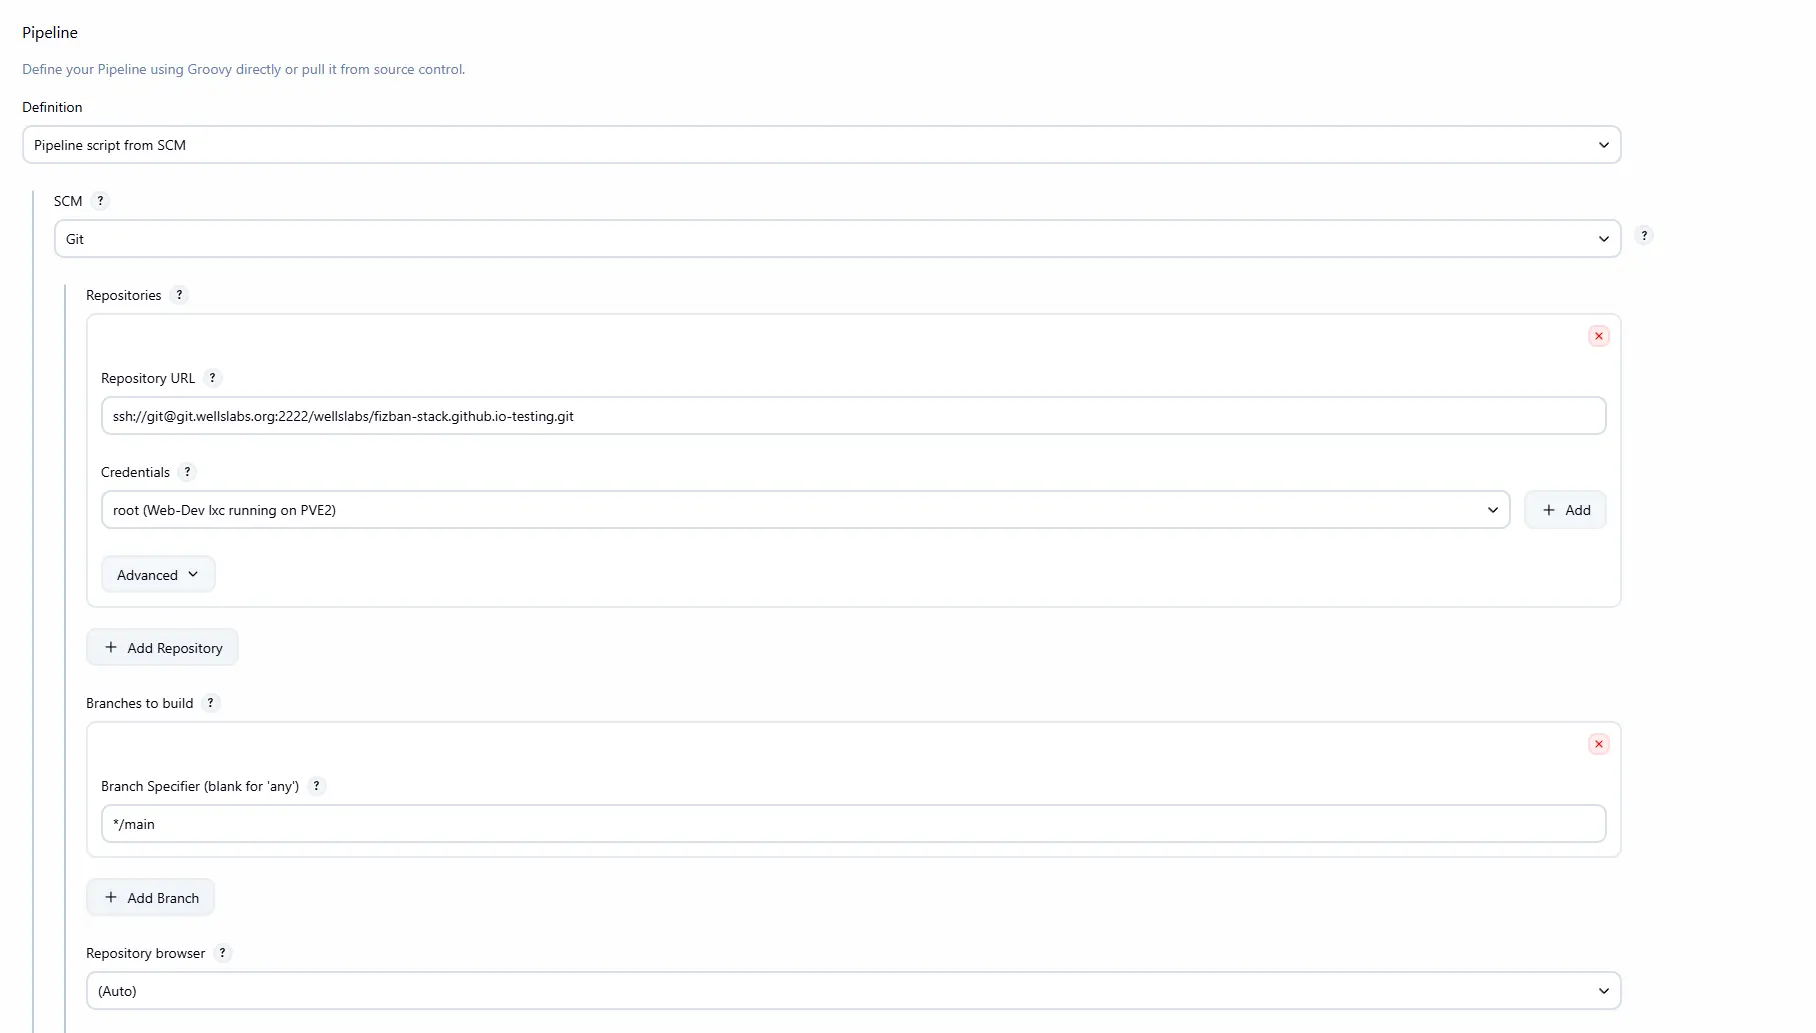
The configuration uses “Pipeline script from SCM” which means Jenkins reads the Jenkinsfile directly from the repository. The repository URL points to Forgejo via SSH, and I selected the credentials for my Web-Dev server. The branch specifier is set to */main so it only builds from the main branch.
Build Status
The pipeline status page shows the build history:
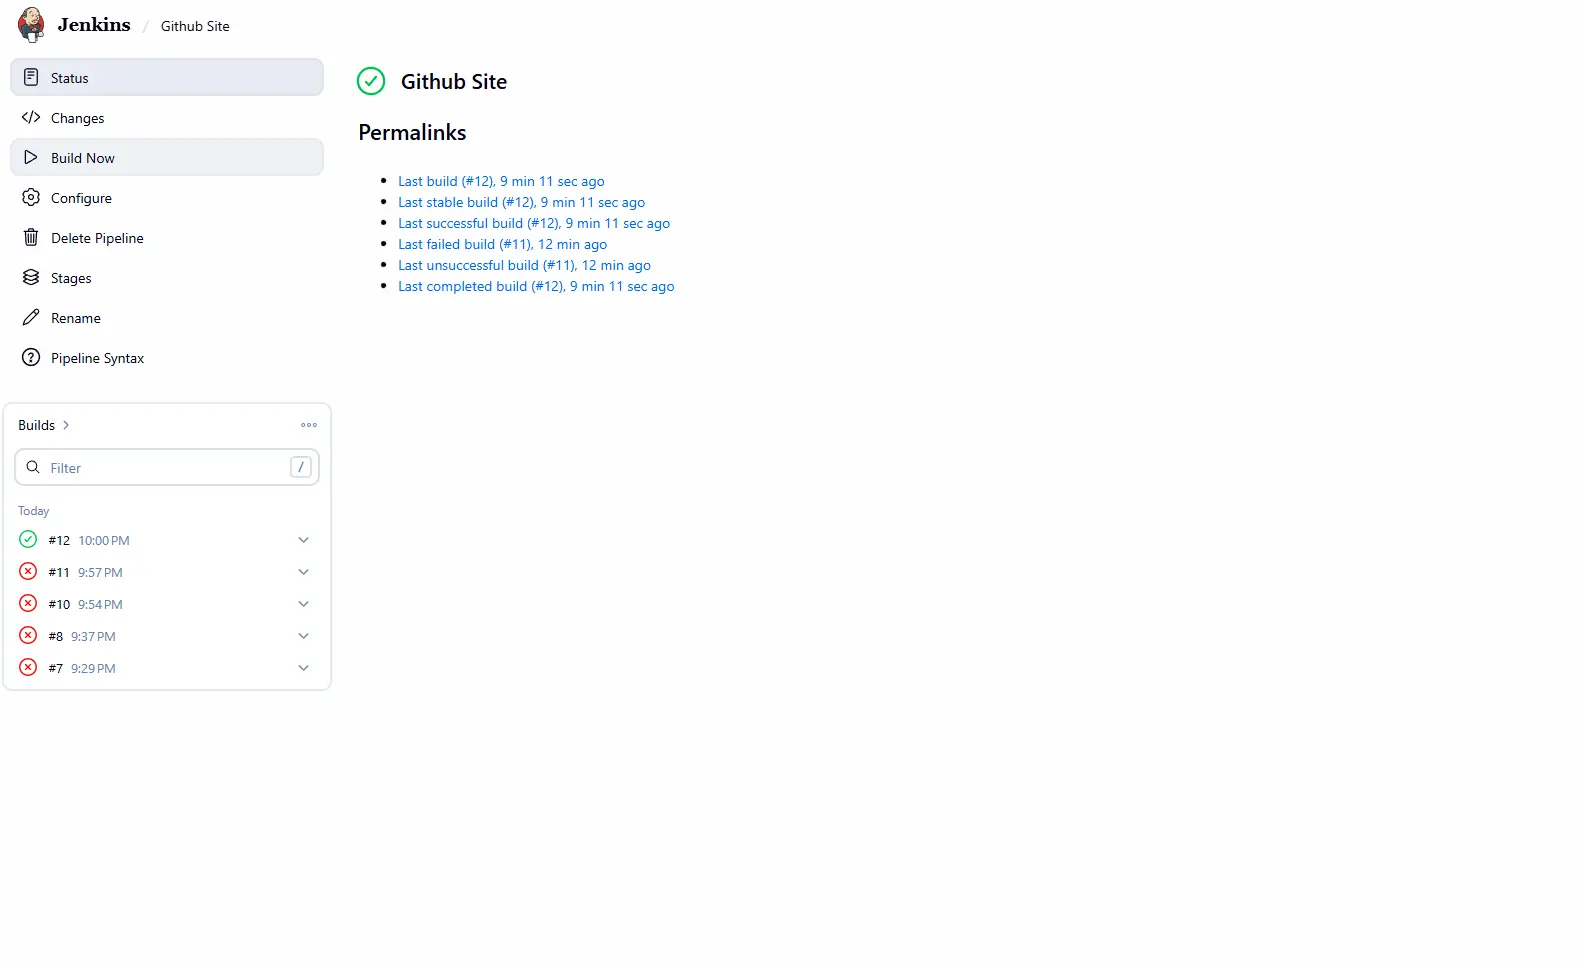
After some initial troubleshooting (builds #7-#11 failed while I worked out configuration issues), build #12 succeeded. The permalinks section shows quick access to the last successful build, last failed build, and other useful references.
Automated Testing and Iteration
With this Jenkins setup, I now have a fully automated workflow for testing iterations of my site. Whenever I push changes to my Forgejo repository, Jenkins automatically:
- Detects the new commits via webhook
- Clones the latest code to the Web-Dev server
- Installs any new or updated gem dependencies
- Builds the Jekyll site
- Deploys the generated files to the web server
This means I can make changes, push them, and see the results on my test site without manually SSHing into servers or running build commands. If a build fails (maybe I introduced a syntax error in a template), Jenkins notifies me immediately and I can check the console output to diagnose the issue.
This CI pipeline has also become an excellent learning tool. Setting it up forced me to understand how all these pieces connect - from git webhooks to SSH authentication to pipeline syntax. Troubleshooting the failed builds taught me about Ruby gem dependencies and Jekyll’s build process. The hands-on experience of debugging a real pipeline is far more valuable than reading documentation.
CI Pipeline Issues
I had more issues with this pipeline than I thought I would. At first, I was going to use the root account on the web server since it is only for local development, but Ruby won’t let you use the root account for build. Then, the pipeline failed while pushing to the web server because my local user was not in the www-data group. After fixing this, the build worked, but had errors because it had trouble updating file attributes. It is working now and I have a structured pipeline to test my GitHub site locally. Before this, I would push updates to GitHub and inspect the site as a live site. This was problematic when I made some changes that I didn’t like because the site was already on the internet.
Future Enhancements
There are several improvements I could make to this setup:
Automated Testing: Before deploying, I could add a stage that runs HTML validation, checks for broken links, or verifies that critical pages load correctly. This would catch issues before they reach even the test server.
Branch-Based Deployments: Instead of only building the main branch, I could configure Jenkins to build feature branches and deploy them to subdirectories or separate virtual hosts. This would allow me to preview changes in isolation before merging.
Notifications: Adding Slack or Discord notifications would alert me to build failures without having to check the Jenkins dashboard. The Gitea Checks plugin already reports status back to Forgejo, but real-time notifications would improve the feedback loop.
Blue-Green Deployments: Instead of copying files directly to the web root, I could deploy to a staging directory and use a symlink swap to atomically switch between versions. This would eliminate any brief inconsistency during deployment.
Docker-Based Builds: Running the build inside a Docker container would isolate the build environment and make it reproducible. This would also make it easier to test with different Ruby versions or Jekyll configurations.
Conclusion
Setting up Jenkins for my homelab site has been a rewarding project that bridges multiple technologies - from NPM reverse proxying to Forgejo git hosting to Jekyll static site generation. The pipeline automates what used to be a manual, error-prone process and gives me confidence that every push is built and deployed consistently. More importantly, it’s given me practical experience with CI/CD concepts that translate directly to enterprise environments.